Tailwind + ASP.NET

By default, an ASP.NET project comes with bootstrap 5 pre-installed. Bootstrap is a great way to get a clean UI (with dark mode) right out of the box. However, some projects require more flexibility than what bootstrap can offer. Here is how you can get tailwind set up in your ASP.NET project.
NOTE: This tutorial assumes you already have basic knowledge of creating and running ASP.NET apps.
Requirements
- NodeJS (If you are on Mac or Linux, NVM is a great and easy option to get Node)
- .NET 8 (This does work with .NET 6 as well)
- Visual Studio/Rider/VS Code
Creating our project
To create our project run this in our project directory.
1
dotnet new mvc -n aspnet-tailwind
Now, run our project to make sure everything is working properly.
1
dotnet run
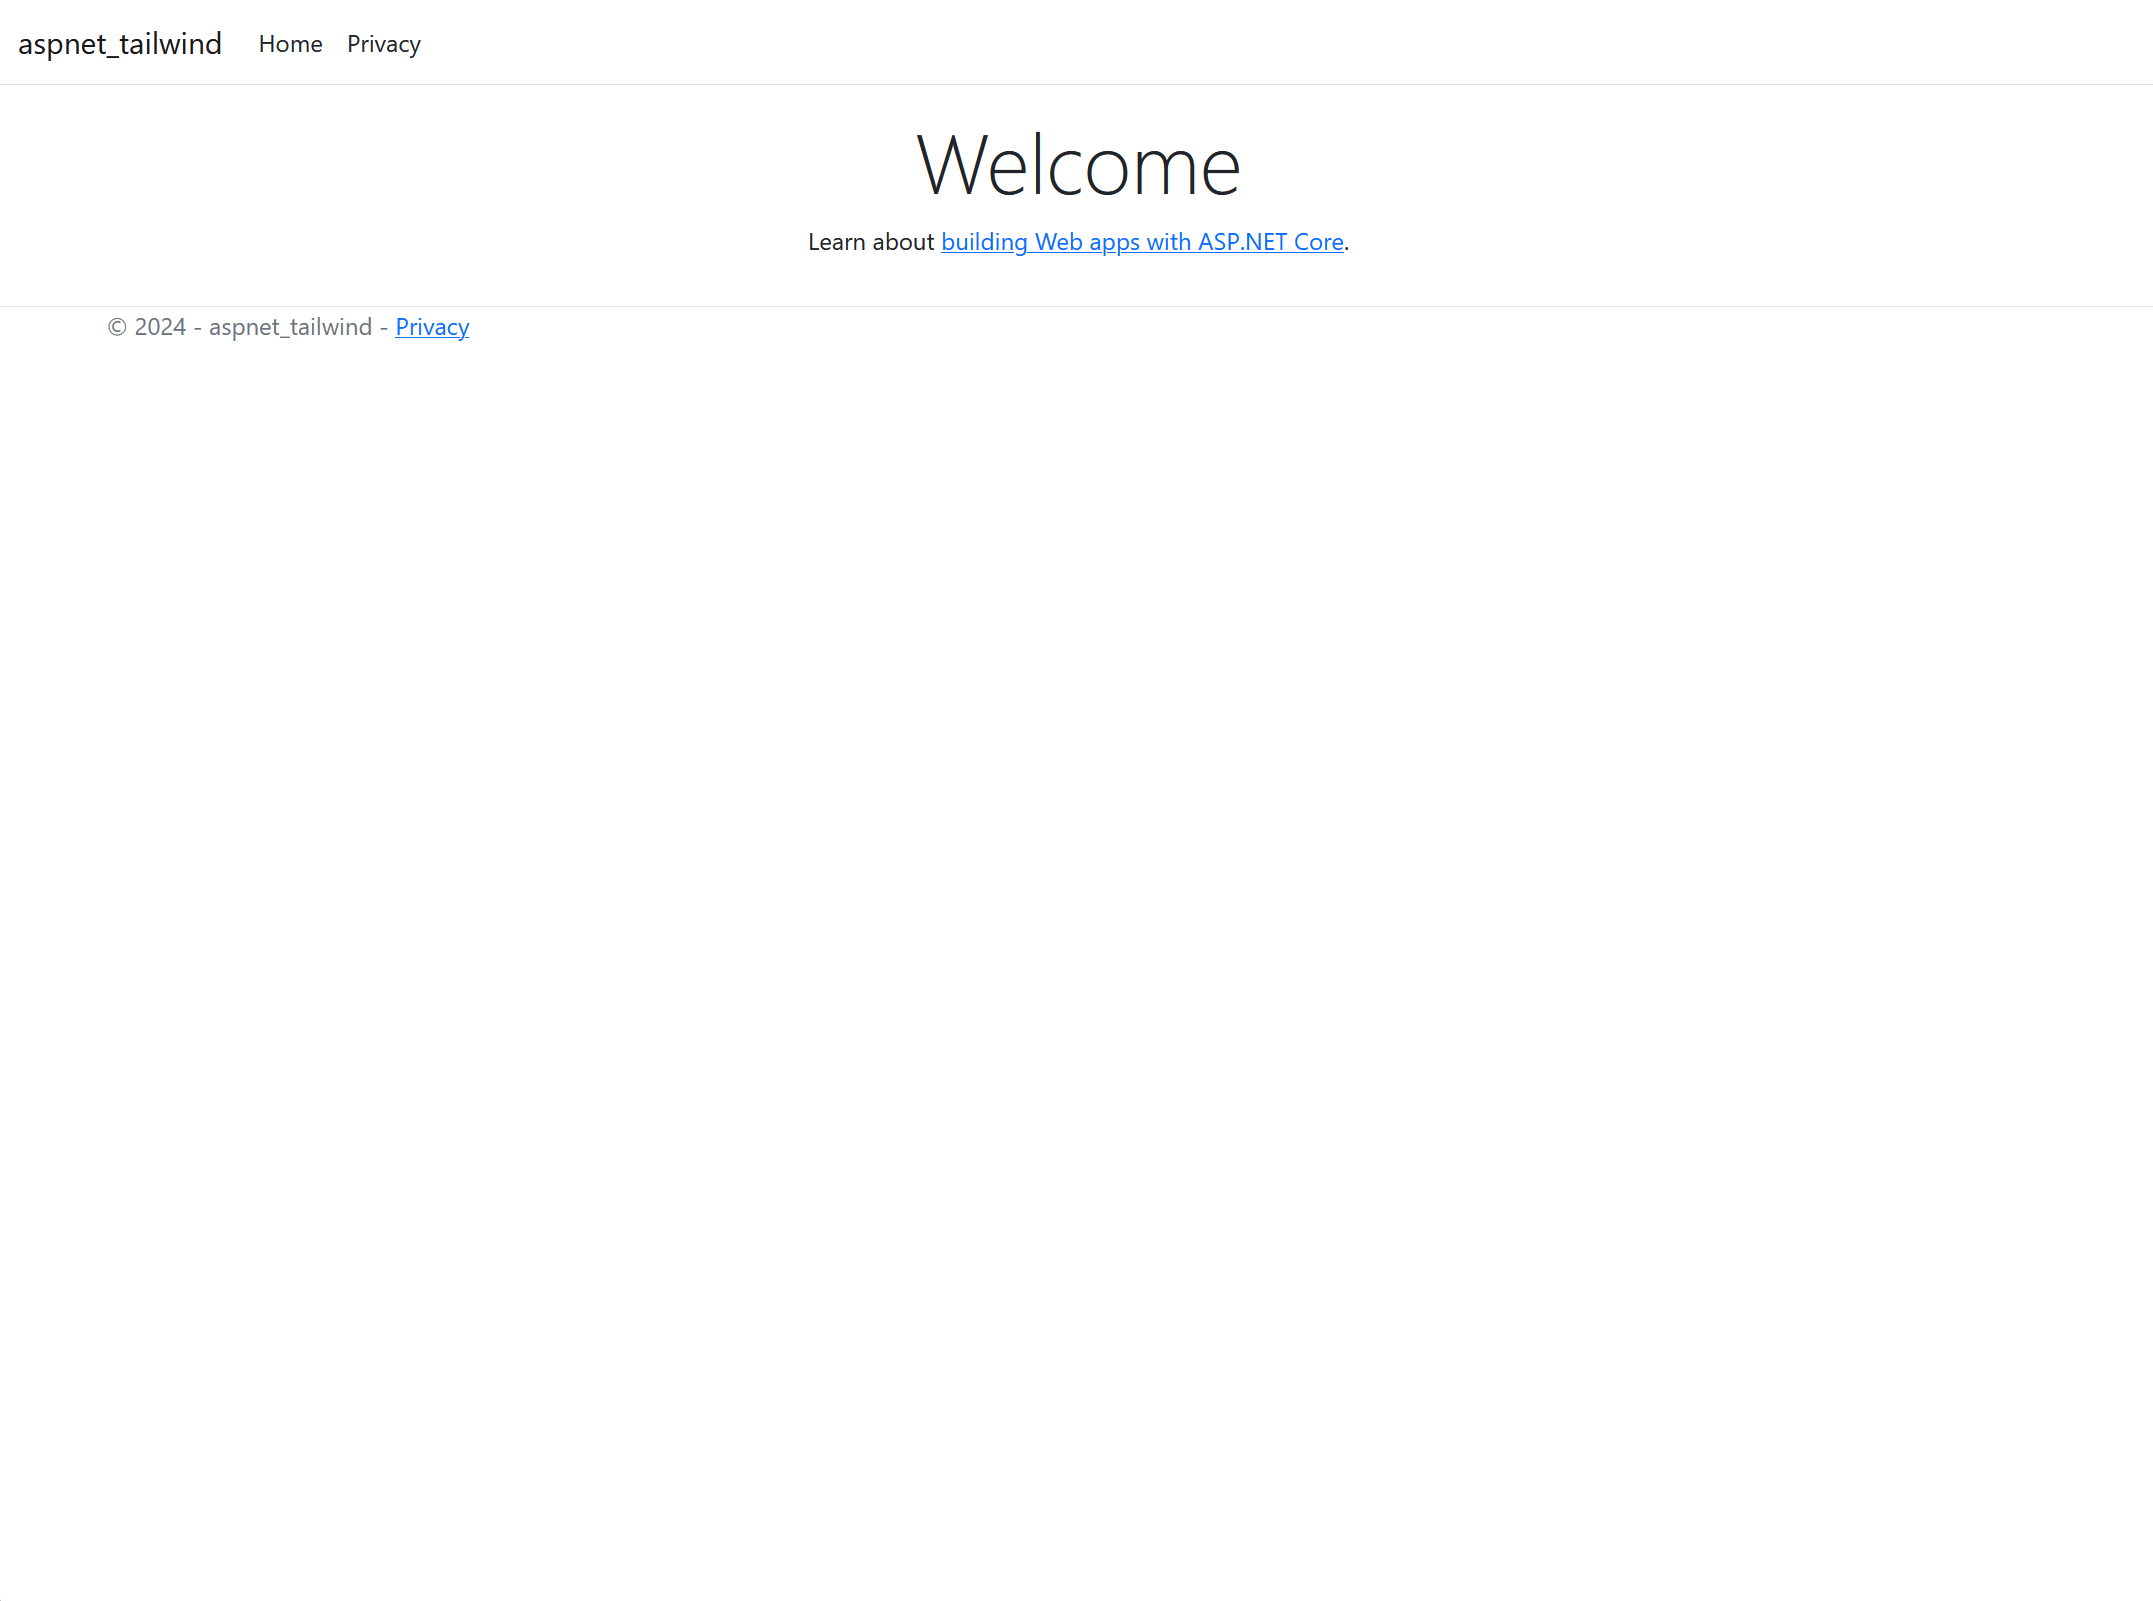 This is what we should see.
Adding Tailwind
In our project directory, run:
1
npm init -y
You should see the package.json file appear, and this output in our terminal:
1
2
3
4
5
6
7
8
9
10
11
12
13
14
Wrote to {your-path}\aspnet-tailwind\package.json:

{
 "name": "aspnet-tailwind",
 "version": "1.0.0",
 "description": "",
 "main": "index.js",
 "scripts": {
  "test": "echo \"Error: no test specified\" && exit 1"
 },
 "keywords": [],
 "author": "",
 "license": "ISC"
}
Now, run this command to install the tailwind package:
1
npm install -D tailwindcss
Then, add this script to our package.json:
1
2
3
"scripts": {
  "css:build": "npx tailwindcss -i ./wwwroot/css/site.css -o ./wwwroot/css/styles.css --minify"
 }
This command will be called to build all of our tailwind styles with the command css:build.
Now, we need to create our tailwind config file. To do so, run this command:
1
npx tailwindcss init
We should see a tailwind.config.js file appear in our project directory.
In that file, overwrite module.exports = {... with:
1
2
3
4
5
6
7
8
9
10
module.exports = {
  content: [
    './Pages/**/*.cshtml',
    './Views/**/*.cshtml'
],
  theme: {
    extend: {},
  },
  plugins: [],
}
This code tells tailwind which directories and files should it build its css file from. So in this case, it will look in the Pages and View folders for anything with a .cshtml ending. If you are using Areas, then you will need to add this block of code also:
1
2
'./Areas/**/Views/**/*.cshtml',
'./Areas/**/Pages/**/**/*.cshtml'
The first line will handle your typical Views folder in an area, and the second line will handle any scaffolded identity if you have any.
Now, let’s move to our wwwroot/css. Remove all code inside of it and replace it with:
1
2
3
@tailwind base;
@tailwind components;
@tailwind utilities;
Afterwards, move to your .csproj file and add this code block inside our <Project Sdk="Microsoft.NET.Sdk.Web"> tag:
1
2
3
4
5
6
7
8
<ItemGroup>
 <UpToDateCheckBuilt Include="wwwroot/css/site.css" Set="Css" />
 <UpToDateCheckBuilt Include="tailwind.config.js" Set="Css" />
</ItemGroup>

<Target Name="Tailwind" BeforeTargets="Build">
 <Exec Command="npm run css:build"/>
</Target>
This final line will run our css:build command we added earlier in our package.json.
Finally, we want to add our stylesheet to our base _Layout.cshtml. You will want to add this to any other _Layouts.cshtml’s you may have in our project.
1
<link rel="stylesheet" href="~/css/styles.css" asp-append-version="true" />
Removing Bootstrap
Now that all of the tailwind is added, we want to now remove any and all bootstrap that came with the project.
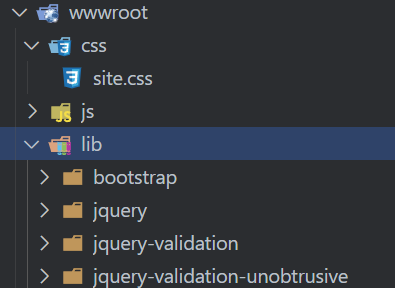
Place 1: wwwroot
In our wwwroot/lib you should see a bootstrap folder. Feel free to delete that folder.
Place 2: _Layout.cshtml
In our _Layout.cshtml you should see places at the top and bottom of your page. Refer to the crossed our sections in the images below to know what to remove:
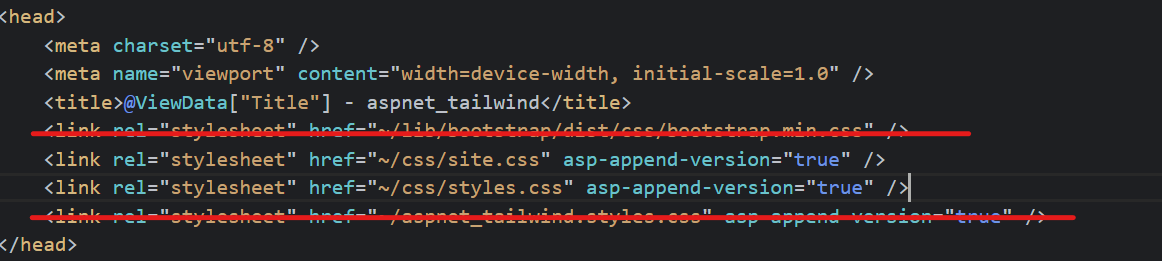 In your header
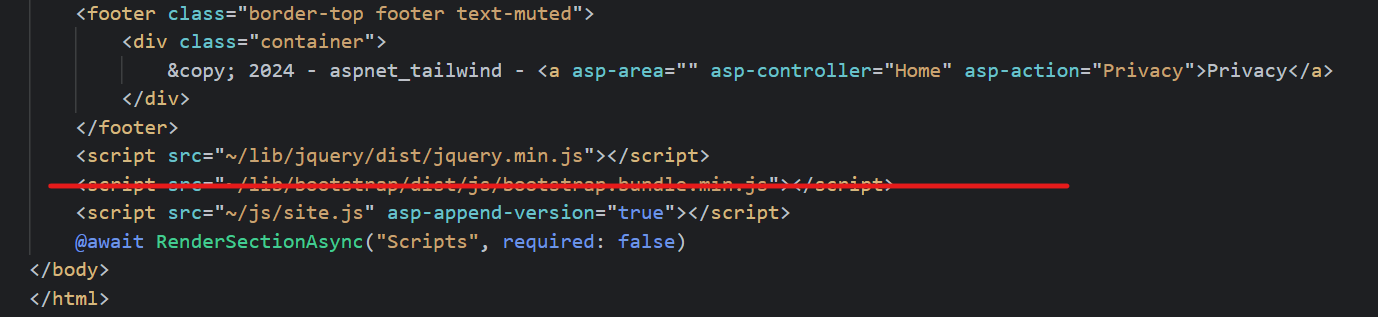 In your script tags
Adding Tailwind Code
Now that tailwind is added and bootstrap is removed. Lets change our _Layout.cshtml and a view to test out tailwind.
In our Layout.cshtml, replace this default code inside the <body> tags:
1
2
3
4
5
6
7
8
9
10
11
12
13
14
15
16
17
18
19
20
21
22
23
24
25
26
27
28
29
30
31
32
<header>
<nav class="navbar navbar-expand-sm navbar-toggleable-sm navbar-light bg-white border-bottom box-shadow mb-3">
<div class="container-fluid">
<a class="navbar-brand" asp-area="" asp-controller="Home" asp-action="Index">aspnet_tailwind</a>
<button class="navbar-toggler" type="button" data-bs-toggle="collapse" data-bs-target=".navbar-collapse" aria-controls="navbarSupportedContent"
aria-expanded="false" aria-label="Toggle navigation">
<span class="navbar-toggler-icon"></span>
</button>
<div class="navbar-collapse collapse d-sm-inline-flex justify-content-between">
<ul class="navbar-nav flex-grow-1">
<li class="nav-item">
<a class="nav-link text-dark" asp-area="" asp-controller="Home" asp-action="Index">Home</a>
</li>
<li class="nav-item">
<a class="nav-link text-dark" asp-area="" asp-controller="Home" asp-action="Privacy">Privacy</a>
</li>
</ul>
</div>
</div>
</nav>
</header>
<div class="container">
<main role="main" class="pb-3">
@RenderBody()
</main>
</div>
<footer class="border-top footer text-muted">
<div class="container">
© 2024 - aspnet_tailwind - <a asp-area="" asp-controller="Home" asp-action="Privacy">Privacy</a>
</div>
</footer>
With this new code:
1
2
3
4
5
6
7
8
9
10
11
12
13
14
15
16
17
18
19
20
<header class="bg-blue-600 text-white p-4">
<h1 class="text-3xl">My Website</h1>
</header>
<nav class="bg-blue-500 text-white p-2">
<ul class="flex space-x-4">
<li><a href="#" class="hover:underline">Home</a></li>
<li><a href="#" class="hover:underline">About</a></li>
<li><a href="#" class="hover:underline">Services</a></li>
<li><a href="#" class="hover:underline">Contact</a></li>
</ul>
</nav>
<main class="p-4">
<div id="content">
@RenderBody()
</div>
</main>
<footer class="bg-blue-600 text-white p-4 mt-4">
<p>© 2024 My Website</p>
</footer>
Then, in our Home/Index.cshtml view, we can add a tailwind button.
1
2
3
<button class="bg-blue-500 hover:bg-blue-700 text-white font-bold py-2 px-4 rounded">
 Button
</button>
Running the app
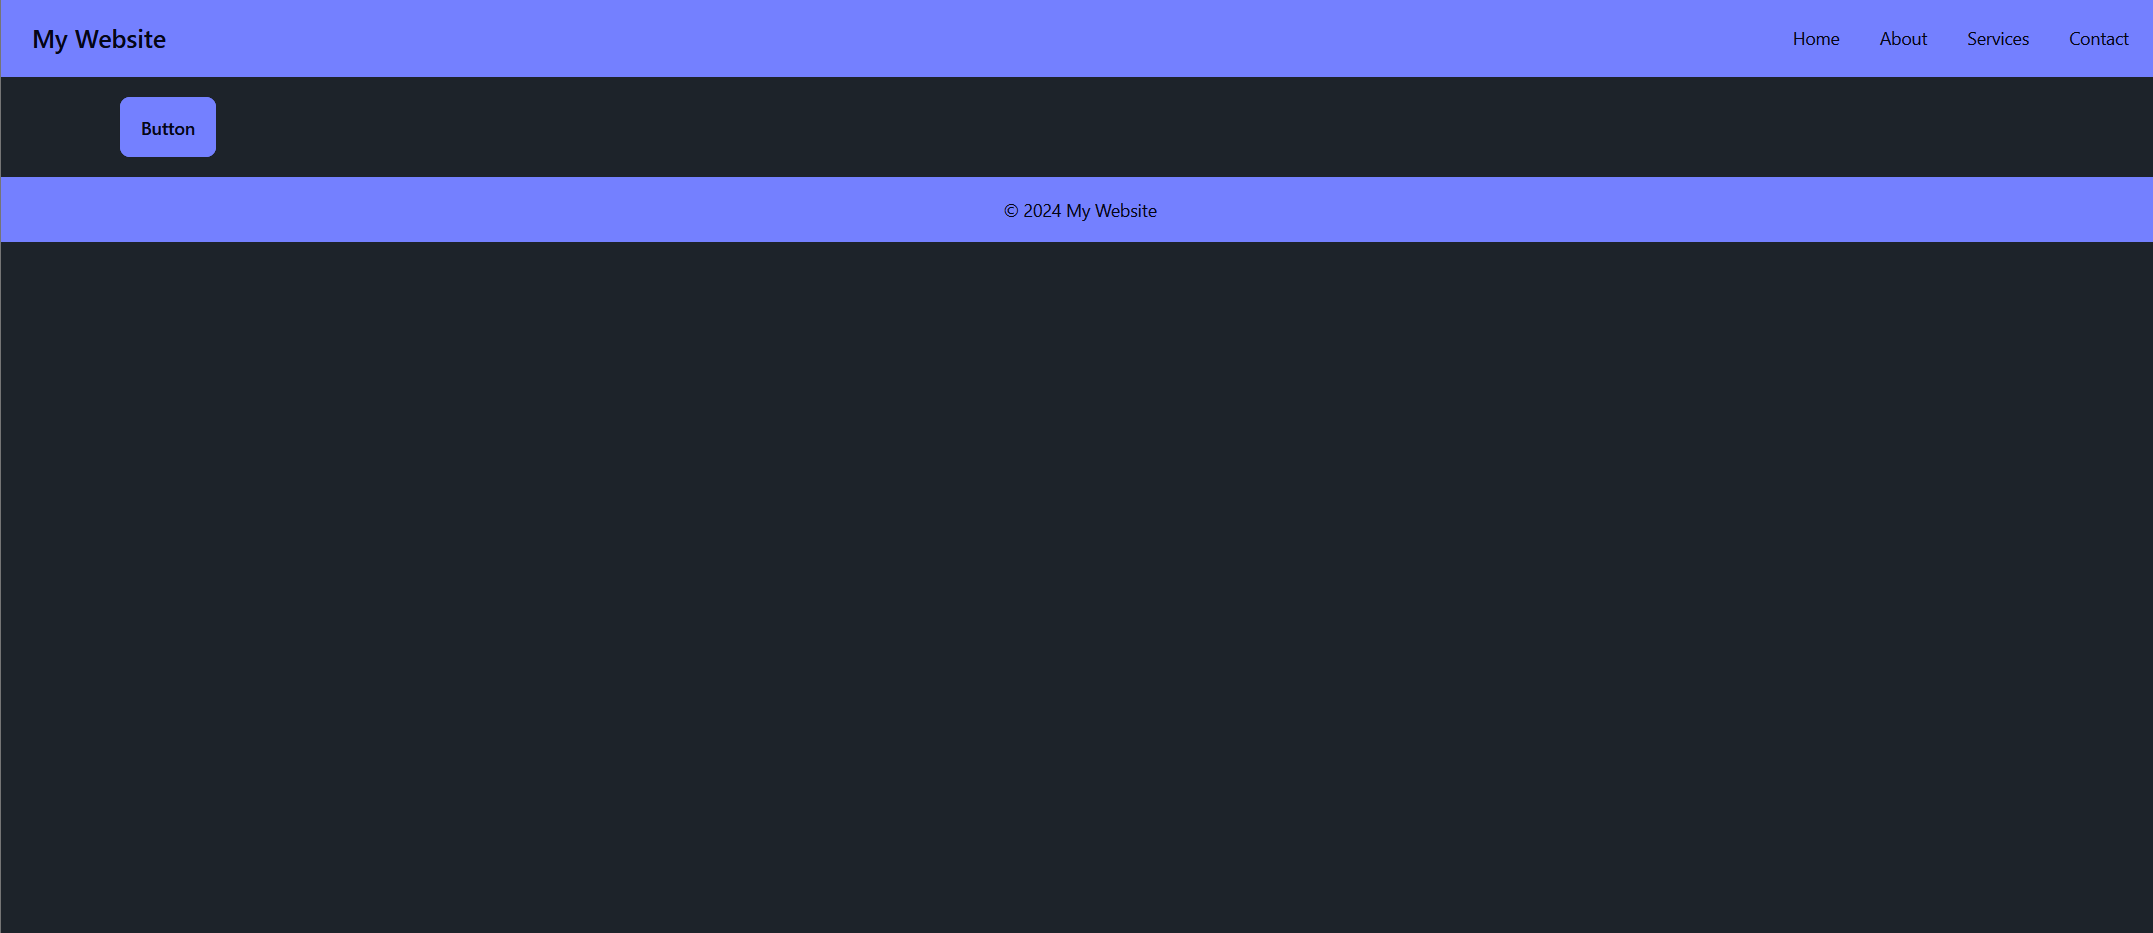
Now with everything installed and added, running
1
dotnet run
should show us this screen:
 Our final product
Now we have an ASP.NET app with tailwind!
Bonus: DaisyUI
If writing pure Tailwind isn’t your cup of tea, we can take this one step further and add DaisyUI in about 30 seconds.
First, in the root of your project run the command:
1
npm i -D daisyui@latest
Then in our tailwind.config.js add this line of code:
1
2
3
plugins: [
  require('daisyui'),
 ],
And that’s it! DaisyUI is now installed.
Navigating back to our _Layout.cshtml, let’s change our base layout a bit to this:
1
2
3
4
5
6
7
8
9
10
11
12
13
14
15
16
17
18
19
20
21
22
23
<header class="navbar bg-primary text-primary-content">
<div class="flex-1">
<a class="btn btn-ghost normal-case text-xl">My Website</a>
</div>
<nav class="flex-none">
<ul class="menu menu-horizontal p-0">
<li><a>Home</a></li>
<li><a>About</a></li>
<li><a>Services</a></li>
<li><a>Contact</a></li>
</ul>
</nav>
</header>
<main class="p-4">
<div id="content" class="container mx-auto">
@RenderBody()
</div>
</main>
<footer class="footer footer-center p-4 bg-primary text-primary-content">
<div>
<p>© 2024 My Website</p>
</div>
</footer>
And now in our Home/Index.cshtml view, we can add a daisyui button.
1
<button class="btn btn-primary">Button</button>
With that added, run our project and we should see this now!
 daisyui final product
And just like that, we have added tailwind and daisyui to our ASP.NET application!